1、Node.js和Vue的安装
node.js安装后node -v和npm -v可看到版本号
安装vue
2、vue create [project]创建Vue工程,然后根据需求编写Vue组件即可,完成后使用npm run serve启动程序。
Electron 是一个开源框架,可借助JavaScript、HTML和CSS构建跨平台桌面应用。它结合Chromium和Node.js,开发者能复用Web技术。众多知名应用如VS Code、Slack都用它开发,具备高效、灵活的特点。
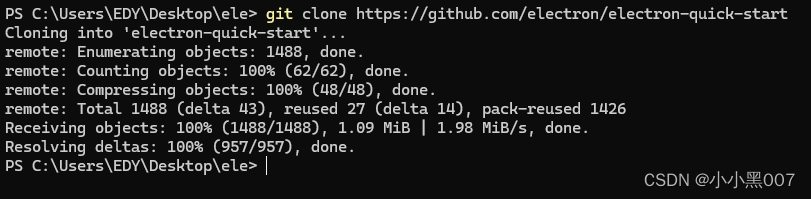
它在Github官方仓库中可以找到各个版本,但是我们国内有很出色的镜像源:
1 https://registry.npmmirror.com/binary.html?path=electron/28.1.0/
electron-builder 是一个为Electron应用量身打造的打包工具。它能把Electron应用打包成可在不同操作系统(如Windows、Mac、Linux)上直接安装运行的格式。支持自动更新、签名等功能,操作简单且功能强大,能大幅提升应用发布效率。
本文选择最稳定的版本进行搭配安装:
依赖 版本 electron 28.1.0 electron-builder 26.0.12
2.1、设置镜像
1 set ELECTRON_MIRROR=https://npmmirror.com/mirrors/electron/
2.2、安装依赖包
1 npm install electron@28.1.0 --save-dev --ignore-scripts
安装成功如下:
2.3、手动下载Electron二进制文件
2.4、移动到目录music-score\node_modules\electron下
2.5、修改install.js脚本
为安装时下载依赖成功,需要注释掉downloadArtifact方法,添加extractFile("electron-v28.1.0-win32-x64.zip");
1
2
3
4
5
6
7
8
9
10
11
12
13
14
15
16
17
18
19
20
21
22
23
24
25
26
27
28
29
30
31
32
33
34
35
36
37
38
39
40
41
42
43
44
45
46
47
48
49
50
51
52
53
54
55
56
57
58
59
60
61
62
63
64
65
66
67
68
69
70
71
72
73
74
75
76
77
78
79
80
81
82
83
84
85
86
87
88
89
90
91
92
93
94
95
96
97
98
99
100
101
102
103
104
105
106
107
108
#!/usr/bin/env node const { version } = require ('./package' );const childProcess = require ('child_process' );const fs = require ('fs' );const os = require ('os' );const path = require ('path' );const extract = require ('extract-zip' );const { downloadArtifact } = require ('@electron/get' );if (process.env .ELECTRON_SKIP_BINARY_DOWNLOAD ) { process.exit (0 ); } const platformPath = getPlatformPath ();if (isInstalled ()) { process.exit (0 ); } const platform = process.env .npm_config_platform || process.platform ;let arch = process.env .npm_config_arch || process.arch ;if (platform === 'darwin' && process.platform === 'darwin' && arch === 'x64' && process.env .npm_config_arch === undefined ) { try { const output = childProcess.execSync ('sysctl -in sysctl.proc_translated' ); if (output.toString ().trim () === '1' ) { arch = 'arm64' ; } } catch { } } extractFile ("electron-v28.1.0-win32-x64.zip" );function isInstalled ( try { if (fs.readFileSync (path.join (__dirname, 'dist' , 'version' ), 'utf-8' ).replace (/^v/ , '' ) !== version) { return false ; } if (fs.readFileSync (path.join (__dirname, 'path.txt' ), 'utf-8' ) !== platformPath) { return false ; } } catch (ignored) { return false ; } const electronPath = process.env .ELECTRON_OVERRIDE_DIST_PATH || path.join (__dirname, 'dist' , platformPath); return fs.existsSync (electronPath); } function extractFile (zipPath ) { const distPath = process.env .ELECTRON_OVERRIDE_DIST_PATH || path.join (__dirname, 'dist' ); return extract (zipPath, { dir : path.join (__dirname, 'dist' ) }).then (() => { const srcTypeDefPath = path.join (distPath, 'electron.d.ts' ); const targetTypeDefPath = path.join (__dirname, 'electron.d.ts' ); const hasTypeDefinitions = fs.existsSync (srcTypeDefPath); if (hasTypeDefinitions) { fs.renameSync (srcTypeDefPath, targetTypeDefPath); } return fs.promises .writeFile (path.join (__dirname, 'path.txt' ), platformPath); }); } function getPlatformPath ( const platform = process.env .npm_config_platform || os.platform (); switch (platform) { case 'mas' : case 'darwin' : return 'Electron.app/Contents/MacOS/Electron' ; case 'freebsd' : case 'openbsd' : case 'linux' : return 'electron' ; case 'win32' : return 'electron.exe' ; default : throw new Error ('Electron builds are not available on platform: ' + platform); } }
2.6、在electron目录下,重新执行安装命令node install.js
这样就会自动解压到当前目录,可以看到多了一个dist目录,至此electron安装完成。
3.1、设置环境变量
1 set ELECTRON_BUILDER_BINARIES_MIRROR=https://npmmirror.com/mirrors/electron-builder-binaries/
3.2、安装
1 npm install electron-builder@26.0.12 --save-dev
在项目根目录新建test-electron.js,代码如下:
1
2
3
const { app } = require ('electron' )console .log ('Electron版本:' , process.versions .electron )app.quit ()
终端执行npx electron ./src/test-electron.js
显示版本号则说明安装成功。
需要定义公共路径和输出目录。
1
2
3
4
5
6
const { defineConfig } = require ('@vue/cli-service' )module .exports = defineConfig ({ transpileDependencies : true , publicPath : './' , outputDir : 'dist' })
最主要的就是build键属性,定义了软件的基本信息。
1
2
3
4
5
6
7
8
9
10
11
12
13
14
15
16
17
18
19
20
21
22
23
24
25
26
27
28
29
30
31
32
33
34
35
36
37
38
39
40
41
42
43
44
45
46
47
48
49
50
51
52
53
54
55
56
57
58
59
60
61
62
63
64
65
66
67
68
69
70
71
72
73
74
{ "name" : "music-score" , "version" : "0.1.0" , "description" : "use five hours to convert web to app" , "main" : "electron-main.js" , "author" : "duzhenhua" , "license" : "ISC" , "private" : true , "build" : { "appId" : "com.dzh.musicscore" , "productName" : "MusicScore" , "directories" : { "output" : "build" } , "win" : { "target" : "portable" , "icon" : "public/icon.ico" } , "files" : [ "dist/**/*" , "electron-main.js" , "package.json" ] , "electronDownload" : { "mirror" : "https://npmmirror.com/mirrors/electron/" } } , "scripts" : { "serve" : "vue-cli-service serve" , "build" : "vue-cli-service build" , "lint" : "vue-cli-service lint" , "postinstall" : "node node_modules/electron/install.js" , "test" : "echo \"Error: no test specified\" && exit 1" , "electron:build" : "electron-builder" , "start" : "electron ." } , "dependencies" : { "@element-plus/icons-vue" : "^2.3.1" , "core-js" : "^3.8.3" , "element-plus" : "^2.9.7" , "vue" : "^3.2.13" } , "devDependencies" : { "@babel/core" : "^7.12.16" , "@babel/eslint-parser" : "^7.12.16" , "@vue/cli-plugin-babel" : "~5.0.0" , "@vue/cli-plugin-eslint" : "~5.0.0" , "@vue/cli-service" : "~5.0.0" , "electron" : "^28.1.0" , "electron-builder" : "^26.0.12" , "eslint" : "^7.32.0" , "eslint-plugin-vue" : "^8.0.3" } , "eslintConfig" : { "root" : true , "env" : { "node" : true } , "extends" : [ "plugin:vue/vue3-essential" , "eslint:recommended" ] , "parserOptions" : { "parser" : "@babel/eslint-parser" } , "rules" : { } } , "browserslist" : [ "> 1%" , "last 2 versions" , "not dead" , "not ie 11" ] }
在项目根目录新建electron-main.js文件,代码如下:
1 2 3 4 5 6 7 8 9 10 11 12 13 14 15 16 17 18 const { app, BrowserWindow } = require ('electron' )const path = require ('path' )function createWindow ( const win = new BrowserWindow ({ width : 1200 , height : 800 , webPreferences : { nodeIntegration : true } }) win.loadFile (path.join (__dirname, 'dist' , 'index.html' )) } app.whenReady ().then (createWindow)
在根目录执行编译命令,然后会在dist目录中生成css、js和html文件。
在根目录执行打包命令,10s不到就可以打包完成。
会在build目录下生成win-unpacked目录,如下:
其中music-score.exe是我们需要的可执行文件,resources目录是依赖文件,我们只需要将win-unpacked压缩,就可以在任何装有Windows系统的电脑上解压运行。


/1016812-20241126145749293-662678124.png)